Give the reader a circuit they can follow
An electrical engineering portfolio can start with one board or circuit you understand well. Show what it needed to do, the part you designed and the evidence you used to check it. A schematic, a board view and a short explanation of a test can tell a useful story without a long list of software names.
This walkthrough uses a fictional battery sensor node to demonstrate the structure. The illustrations are explanatory diagrams, not working schematics, PCB files or measured traces. The example is not a customer testimonial or a tested reference design.
Write the requirement and your role
In this scenario, a student team wants to collect sensor readings from a device without wired power. The portfolio author owns the board and its bring-up; a teammate writes the application firmware. Battery life is a target to investigate, not a result the team has already proved.
That gives the project an honest starting point:
I designed the sensor-node board and planned the bring-up checks. My teammate wrote the application firmware. I needed to make the supply, sensor connection and debug access understandable before we could investigate the device's power use.
For your own project, name the operating conditions that matter. Explain whether this is coursework, a personal build or permitted work from a placement. Leave out confidential designs, customer details and anything you do not have permission to publish.
Use a diagram to show the signal path
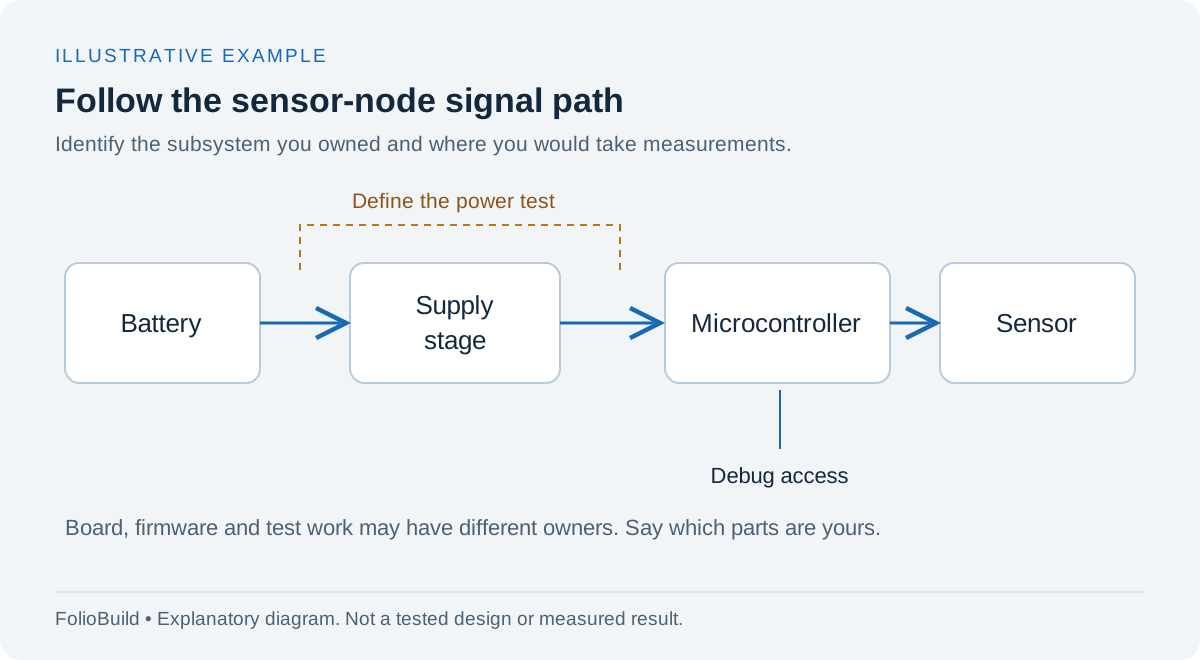
Open the diagram at full size.
The diagram identifies the parts of the example and the places a test might investigate. It contains no component values and is not a circuit to build.
Follow the diagram with one useful design decision. You might explain why a connector moved, why a test point was accessible, or how a component choice followed from a requirement. If you include a full schematic or board render, give the reader a legible crop and enough context to know what they are seeing.
Avoid copying the entire datasheet into the page. Link to the exact part documentation where it supports your decision, then explain what you used from it. If someone else designed the board, say which subsystem or modification was yours.
Show the bring-up process, including the problem
For the fictional node, the first obstacle is an intermittent sensor connection. The author records the symptom, checks the relevant connections and compares the hardware behaviour with the firmware configuration. The important portfolio material is the record of that investigation, not a claim that every fault has been eliminated.
Use a short log:
| Question | Evidence to include from your own work |
|---|---|
| What was expected? | The requirement or expected behaviour |
| What happened instead? | A specific symptom and the conditions that reproduced it |
| What did you inspect? | The relevant schematic region, configuration or measurement |
| What changed? | The hardware or firmware revision you actually made |
| What did you check again? | The repeat test and its result, including unresolved issues |
A failed first revision can still be useful evidence of your work. Explain what you learned from it and avoid claiming ownership of your teammate's fix.
Separate a target from a measurement
“Two-year battery life” could be a requirement, an estimate or an observed outcome. Those are different claims. Label which one you mean. An estimate should name the assumptions it depends on; a measurement should describe the test conditions and how it was taken.
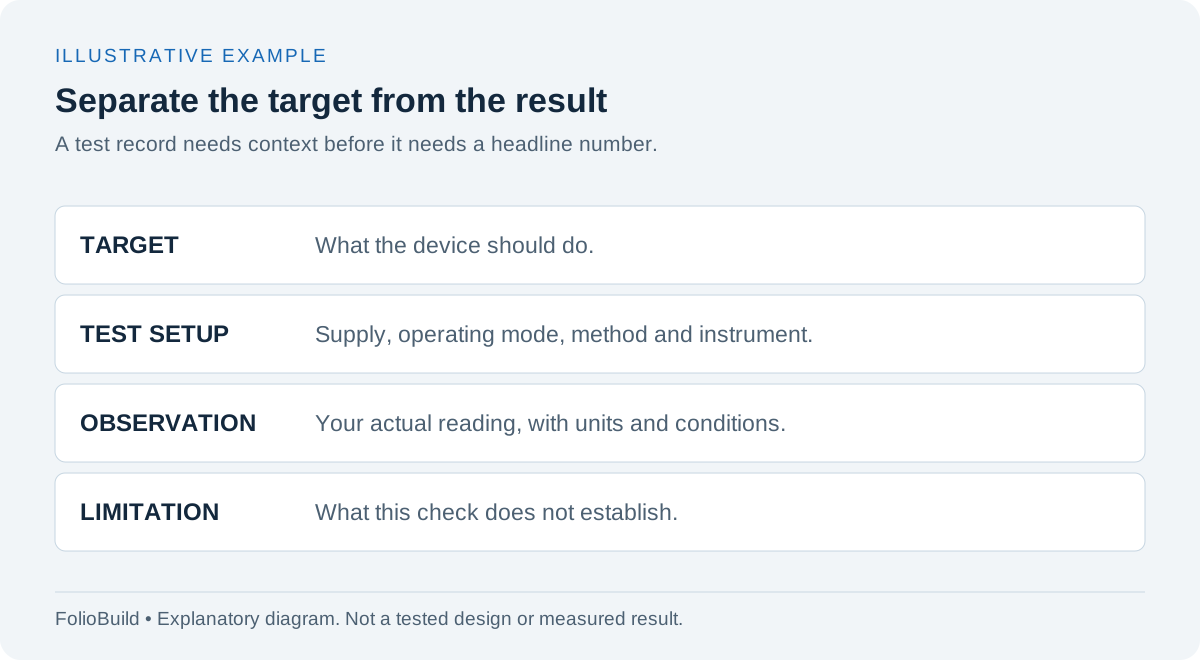
Open the diagram at full size.
A result is easier to assess when the test method and its limitation sit beside it. This example deliberately leaves numeric readings blank.
For a current measurement, useful context could include the supply, the operating mode, the sampling interval and the instrument. Include only details relevant to the claim. A short bench test does not establish a device's lifetime, and a successful demonstration in one setting does not prove it will behave the same way everywhere.
If you only simulated the circuit, label the image as a simulation and state the model assumptions. If you have no measurement yet, describe the planned test separately from the results section. FolioBuild's AI can help draft wording from your notes, but you need to supply and check the evidence.
A completed portfolio entry
Here is sample copy for the fictional project:
I designed the board for a battery-powered sensor node and owned the bring-up checklist. The project page shows the supply and sensor connections, my board-layout decisions and the checks I planned before firmware integration. During bring-up, I investigated an intermittent sensor connection with the firmware author and recorded the changes for a repeat test. Battery life remains a design target. The next step is to collect current measurements across the operating modes and document the assumptions behind an estimate.
For a completed real project, replace the pending work with your actual observations. A caption or short test summary is often enough; you do not need to upload an entire lab notebook. Use real measurements only and keep units with their values.
Choose what to publish
Before sharing a project, check that:
- The reader can tell which work is yours.
- Each image has a purpose and a useful caption.
- Targets, simulations and measured results are clearly distinguished.
- A test result includes the context needed to understand it.
- The shared files contain only material you are allowed to publish.
- Your project or repository link opens the intended public resource.
The Electrical engineering guide explains how this project fits into a full portfolio. The Electric template demonstrates the layout with fictional sample content; use its template button to create your own draft. You can attach a project image and link to supporting work. The template does not independently verify the engineering.
If this is your first portfolio, use the coursework worksheet. For an application, the internship guide helps you choose the most relevant project. Firmware-heavy work also has a place in the embedded systems guide.